Part 113: Link & Shallow Moat
Link & Shallow MoatVideo
A double feature here for your wondering eyes to behold. Link first, and Shallow Moat begins at 35 minutes. And ends up going for over an hour, despite liberal cutting of extraneous footage. Had I known I was going to spend so much time on it, I'd have split them up. That one sort of snuck up on me, as we'll see. But first ...
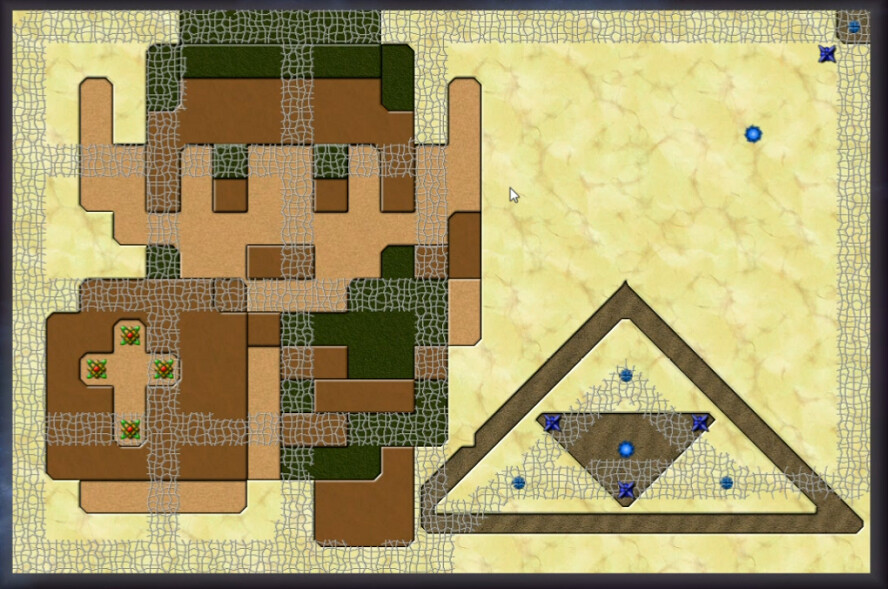
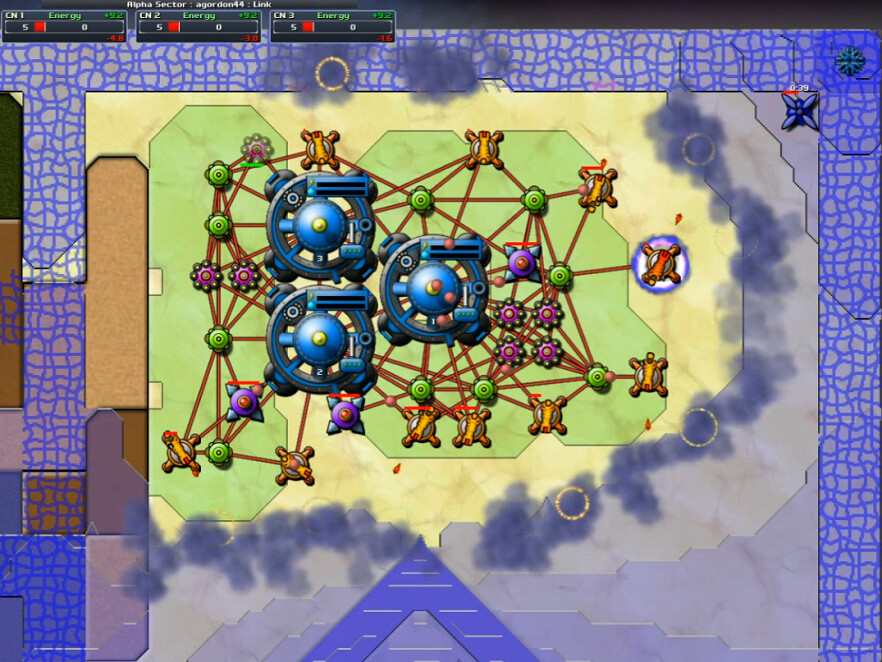
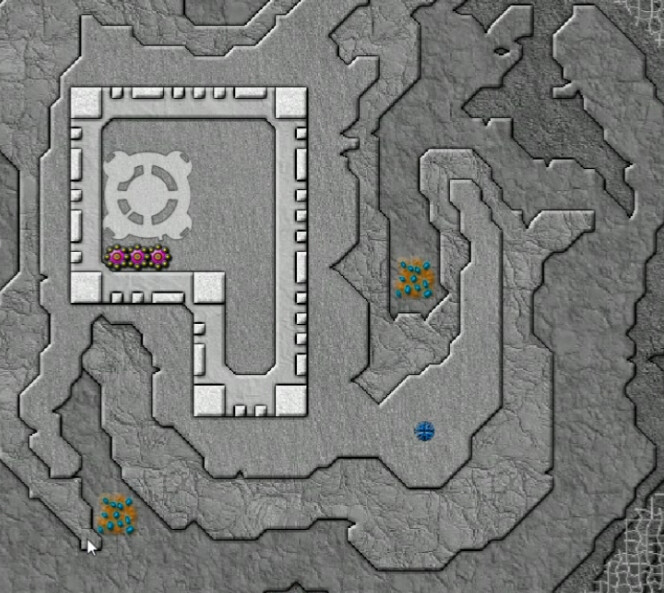
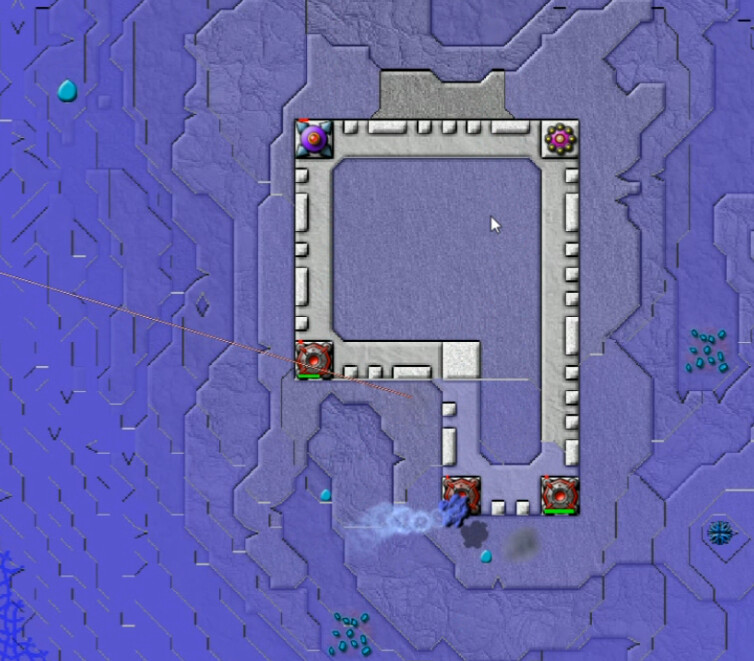
I'm sure many of you will want to revoke my gamer-card for this, but I grew up in the age of the Legend of Zelda. And never got very far in it. I know this the hero Link, and the lower right displays the TriForce symbol. And I couldn't tell you much more about it. But obviously it's a significant chunk of gaming history. Clearly the author of this map, agordon44, is a fan.
Our protagonists 'sword' has four Totems, and there might be a good way to land a command node over there or something and utilize those. I considered it, then fairly swiftly rejected it. There's too much inviting real-estate in the northeast. My approach was basically to attack the TriForce and ignore Link almost completely. I'm sure there's some appropriate punishment that awaits me for such hubris.

Took me 45 seconds to lose a collector. One thing about mostly flat maps that are fairly small - they don't give you a lot of time. Whatever you want to do here, you don't want to dilly-dally around doing it.
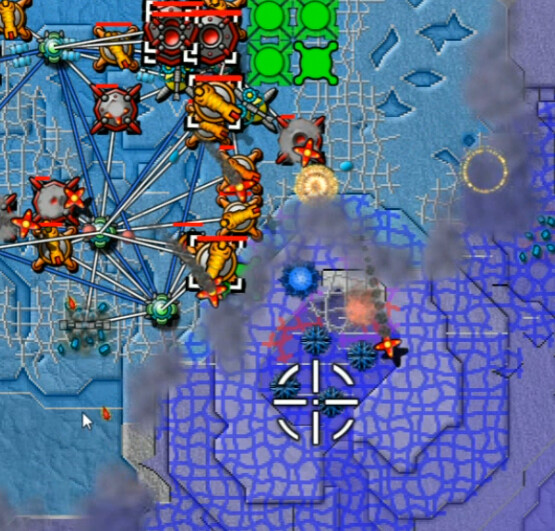
I originally thought I'd just put two Digitalis Cannons in the north and cut that off. Yeah, even three doesn't come close. The clouded part in the east covers an Air Exclusion Tower, which I'm working on nullifying - a good way to get an early PZ. I just got a warning that four spores are incoming, at 2:21 mission time. I'm not ready, obviously. Less than a minute later I'm still not ready, and they crash into the network, taking out more than enough stuff to sink me. So I made it 3-3.5 minutes.
Take 2 - 5:11 video

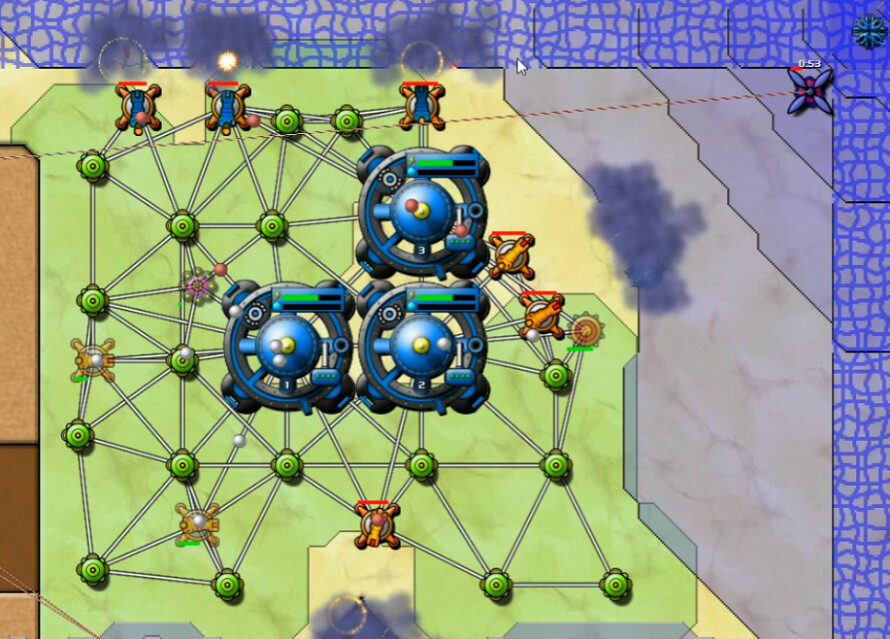
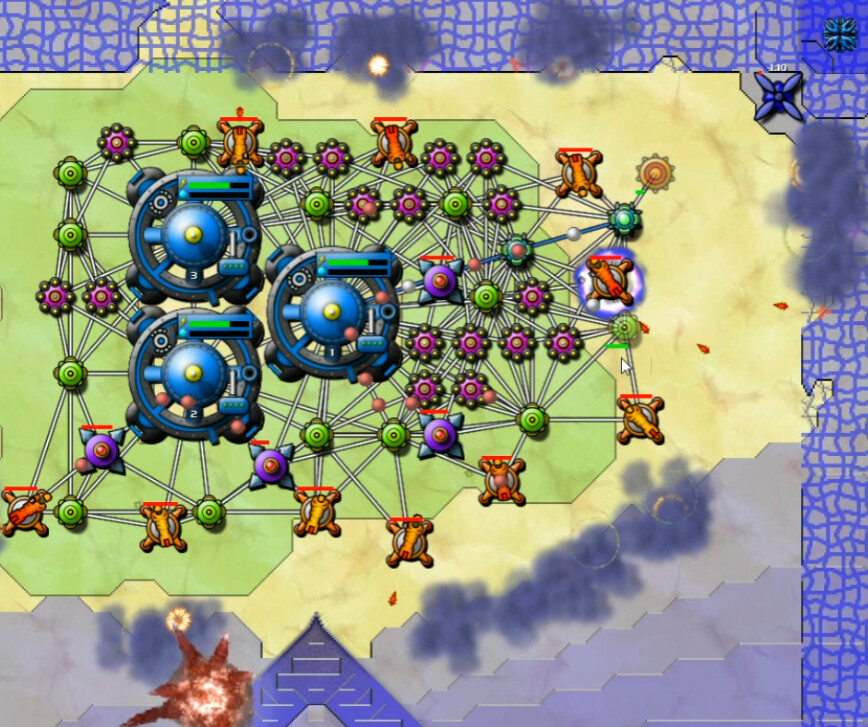
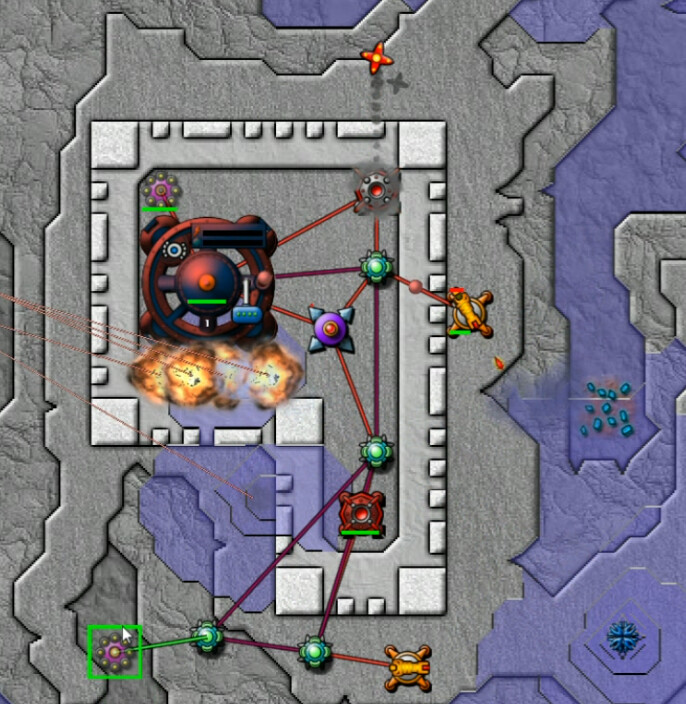
I felt I had the right general idea, and just needed to improve on the execution. I throw down a handful of Cannons right away, along with the Nullifier. I think it's worth it to get an early SuperCannon going. With all three Command Nodes, this kind of early expenditure is sustainable ... at least until the weapons come on-line.
This is about the point at which my first try failed. The SuperCannon is up, I've got a couple Beams and a Reactor going with more on the way, energy is quite healthy at the moment - in fact, it's topped out and I need to be building more. Definitely better.
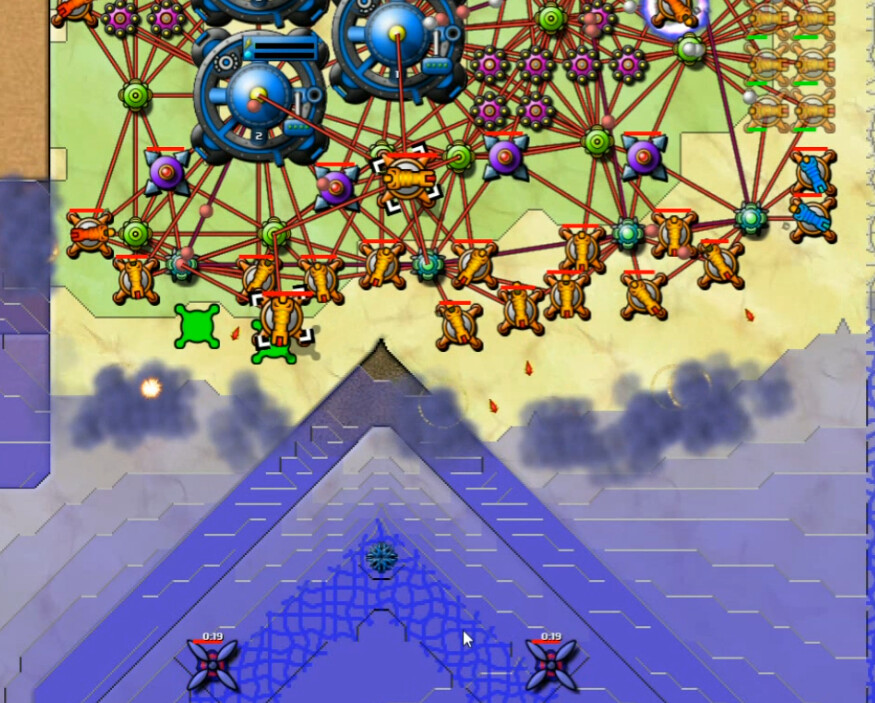
The TriForce is overflowing, and our Cannons in the south can't keep up. Got hit with a couple spores as they all went for the same section of the network as well, but the main problem is just that the initial trenches have been filled and we don't have the firepower for it. Also, this map is !Mortars, so that's not an option. I try to build more cannons and hold the line, but it's hopeless - I don't have the time to get enough of them built, or to get reactors to power them, or the space to put up enough collectors either. At about the 5-minute mark, I give up again.
Take 3 - 10:12 video
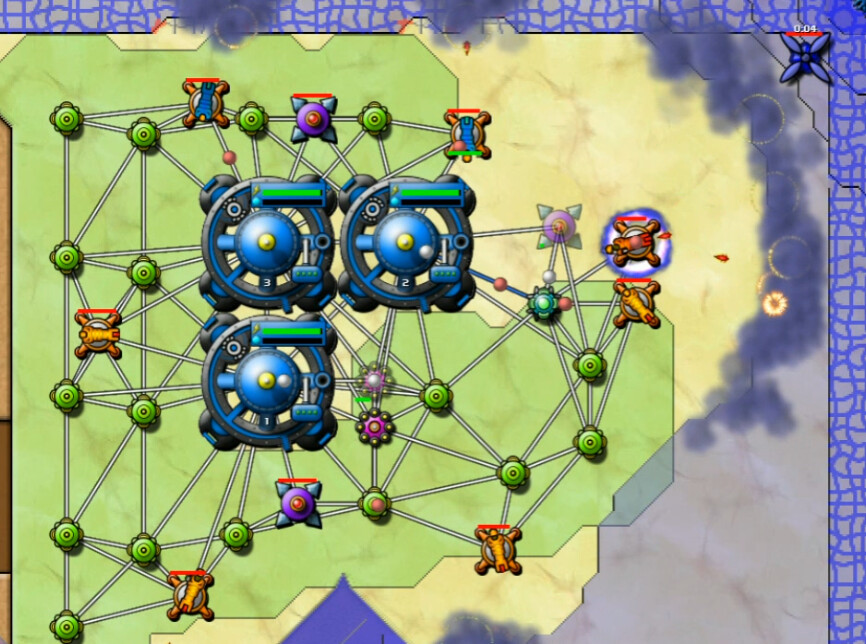
I focus this time on getting more Reactors up quickly, building them in pairs, and in throwing more cannons into the fight in the south faster. I succeed in both of those endeavors - but am still pushed back. Pushed back is better than overrun though, and at this point I am holding. Barely. A moderate energy deficit is still an issue.
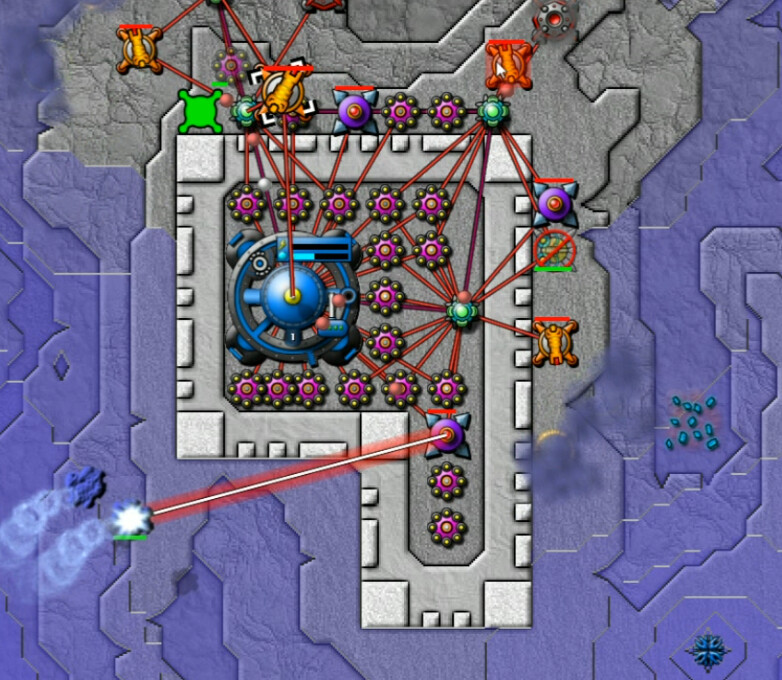
It's about six minutes later before I dare try to expand much. In between, I crammed all the additional reactors in wherever I could find room - and sometimes where I didn't have any, by moving/destroying things that were in the way. For a couple the deficit reached 10-11 as I was building them, but I maintained just enough flow to fend off all attacks ... and now I'm ready to push back, taking aim here at the Spore Tower in the corner.
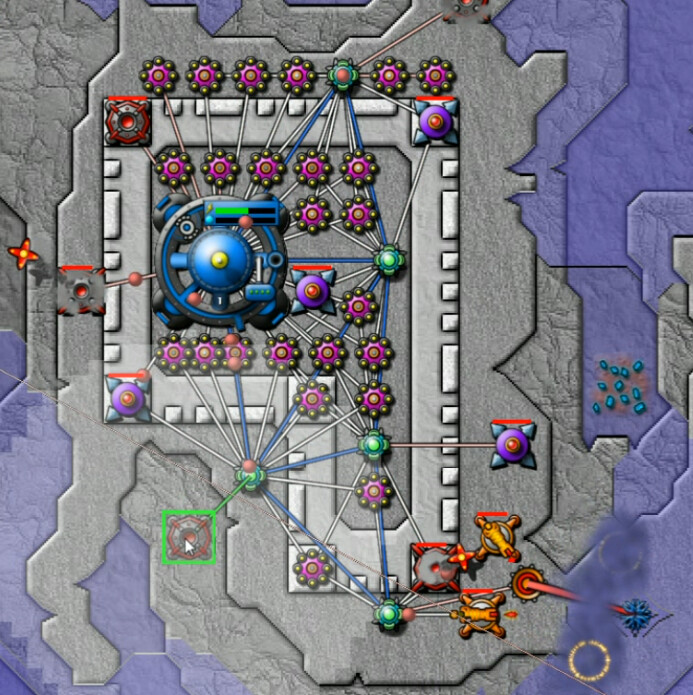
Once that corner is dealt with, I shove a SuperReactor in place of the emitter there and go nuts with the cannons on the southern front.

Without having access to those Totems that Link guards, all I've got is sheer numbers. It's more than enough though. The first Nullifiers go up in or just outside of the 'triangle', and things get a bit dicey when I cross over and deal with the Digitalis later on. Cramming in the cannons pretty much everywhere and using the Power Zones for SuperNullifiers or Digitalis Cannons as needed handles things effectively though.
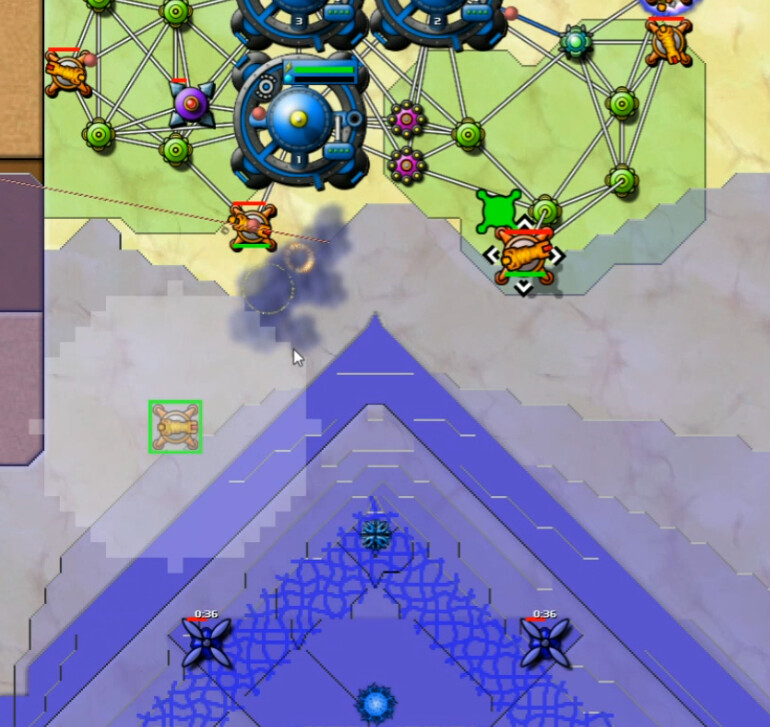
About 27 minutes on the successful attempt. I'm ambitiously desiring more, so I head on to the Molay system for this;
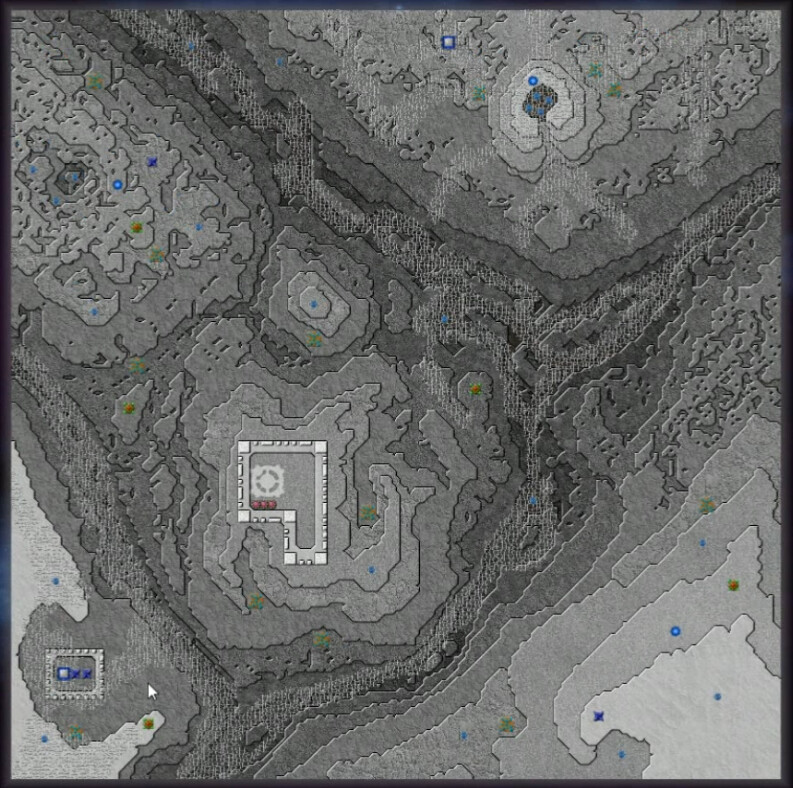
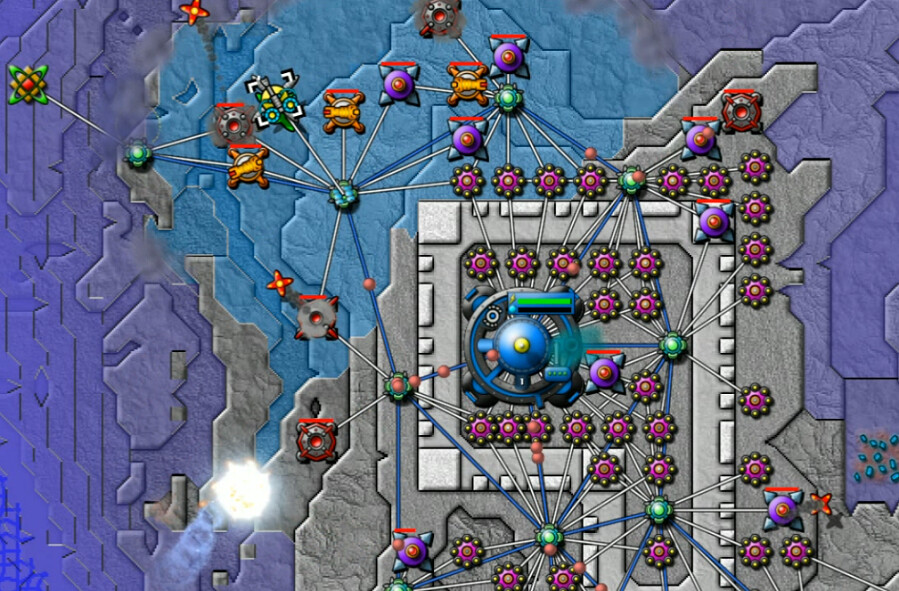
Big map, as you can no doubt see. There's quite a few emitters, but none of them are very strong and we've got the high ground in the nearly centralized 'castle'. Digitalis forms most of the shallow moat. All of this leads to me deciding that this will be a fairly quick and uneventful conquest.
Yeah, about that ...
The keep or whatever here spots us three Reactors - spaced closer together than we can actually build them manually, I might add. Not sure how that works. Bizarrely, the command node is also pre-targeted though we don't have to follow that placement. It's wise to do so, however.

I want to go after things like that nearby emitter quickly. Also, when on the high ground, use emitters for defense. And there'll be spores coming, hence the Beam. this is How To Overbuild Your Energy Supplies 101. I start adding more Reactors a bit later, but it's way too late.
One Beam without adequate supply can't pretend to stop the Spores that come at us. This is the second pair, cerca 3:45 mission time. FAIL.
Take 2 - 39:41 video
At least I saw clearly that energy was the problem. Identifying the screwup is Step 1 on the road to recovery. Now what would I do with this knowledge?

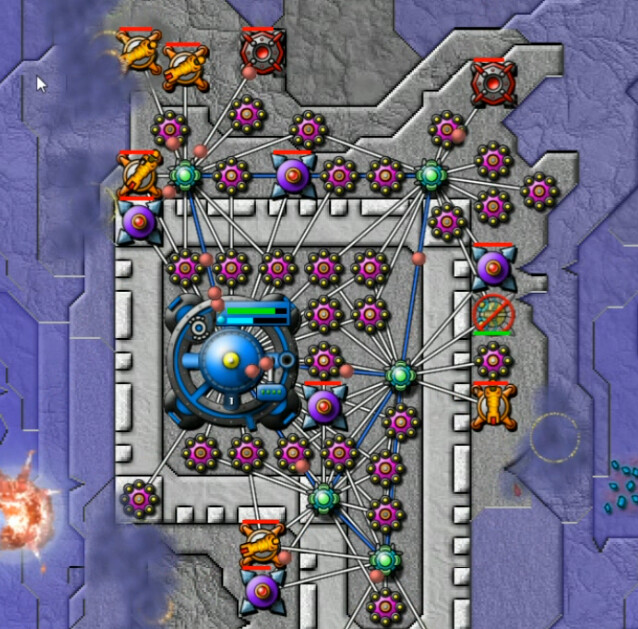
This is much more sensible. Ignoring the creeper for now - it can't initially touch us anyway - I make sure I reserve room for a couple beams but de-activate them, and then gradually build up more reactors to build the economy more.

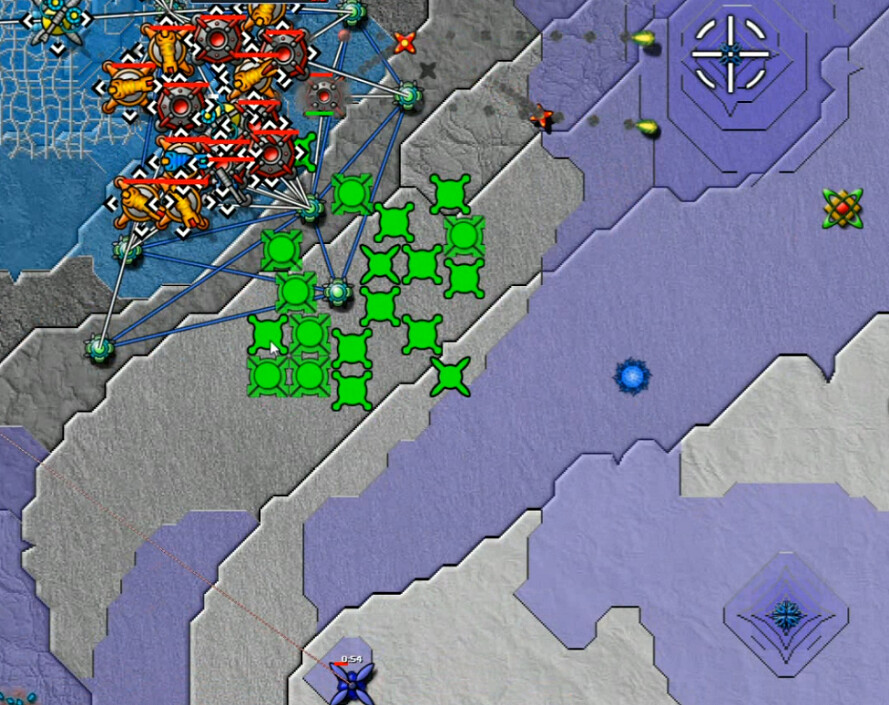
Five minutes in. I have two beams and a third on the way at the time of the initial strike. They are soon almost constantly peppering our defenses with these energy-thieving spores, while I work to gradually push out beyond the protective walls, which I've basically filled up by this point. I've got a mortar or two on the north side right now as well.

This is a short bit later, which shows the situation more clearly. It's not just the nearby emitter which is a threat. The rest of the map has basically filled, and while we still have some time before it reaches us, the battle here is to fight off the spores while balancing between the energy and weapons required to acquire enough space to build more. I didn't fully appreciate that until I'd attempted this level a few times. That aspect of it is pretty well-done, and I think produces a moderately-challenging start. Very doable if you are smart about things, but it's far from being a pushover.
I have no access to Totems yet, and wouldn't be able to spare the space for a Forge even if I did.
I made the mistake of having too many weapons, not enough energy, and ran a deficit of 8-9 for a while. Here my deficit is down lower than that - because I've lost some stuff and been forced to retreat. And the pace of the Spores is increasing. The screws are tightening - I'm all cramped up with nowhere to go. It's non-trivial to get yourself in this kind of situation, and once it happens you're in a pickle.
I deactivate the least-vital cannon I have to preserve enough energy for the beams. If they run out, we're dead, period. The south is threatening to overflow, and then a spore gets through that way knocking out a bunch of stuff. I fight it off and start rebuilding, but then ...

The walls are breached. 14 minutes in, and for the last several I've been barely able to stave off disaster. I've added some Reactors, but not enough to do more than keep pace with the increasing pressure and deal with crises as they pop up. Every once in a while a spore or two gets through, and it's a desperate to race to repair enough of the damage to handle the next salvo incoming. And by now, there's always more incoming. Always.
I figure out that I can throw stuff on the keep towers, and I use that space as well. Aside from that, you might well ask what has changed here. 22 minutes, and the situation's almost exactly the same as it was after a third of that time. This has been one heck of a tense stand-off.
The other shoe is about to drop, though.

This is a salvo of a dozen Spores, all at once from the same Tower. As dirty tricks go, I rather like this one. I react merely 'Whoa, hello!'. We're used to a few at a time, and about 4 Beams has been plenty so long as I keep them powered. 15 seconds prior to this I felt like I probably was going to win this still -- eventually - and was on the cusp of starting to be able to make slow progress.
Here's another 15 seconds, roughly ...

Red notices on the left side of the screen inform me that pretty much all the Reactors are gone, with '10 more messages'. "Where the heck did that come from?!"
I try to save it, but it's hopeless. The offending spore tower is in the northwest of the map, and once it reaches the timer it will launch a dozen at us every few minutes until we shut it down. Eventually the command node withdraws to orbit, too damaged to function. AC rains down as I survey the few last holdouts of the keep defense, and know that they are doomed as well.
Take 3 - 1:04:39 video
I have a little blurb at this point where I talk about my newfound respect for the level before unpausing, and then I skip the first few minutes.

And cut back in shortly before this, so you can see me not activate the beams in time trying to be too cute. Well, at least I didn't waste much time on that attempt ...
Take 4 - 1:05:39 video

As you can see I am erring on the side of energy here, having learned what a real bad idea it is to have your beams run low on it. I'm also strategically using the corner towers for placement, and only when I basically run out of room just before this shot venturing outside the keep to acquire more territory.
This focus allowed me, though just a hair short on energy for it, to take out the nearby emitter here at about seven minutes in. I must endorse the idea as the safest way to play this level. Don't throw caution to the winds, or your infrastructure will follow it shortly
") . Unless you're a lot better than me, of course.
. Unless you're a lot better than me, of course. A bit after this I checked in on our friend the mass-salvo spore tower - and it was less than halfway built. I still lost some things as I slowly extended our perimeter, usually due to spore strikes; as they pushed outwards, the beams were less able to assist each other, and I didn't always get enough of them up in time.

16 minutes roughly, and I've now got a source of ore secured here. Originally I had a bertha planned on the PZ, but I decided to go with a SuperBeam for added anti-air security.
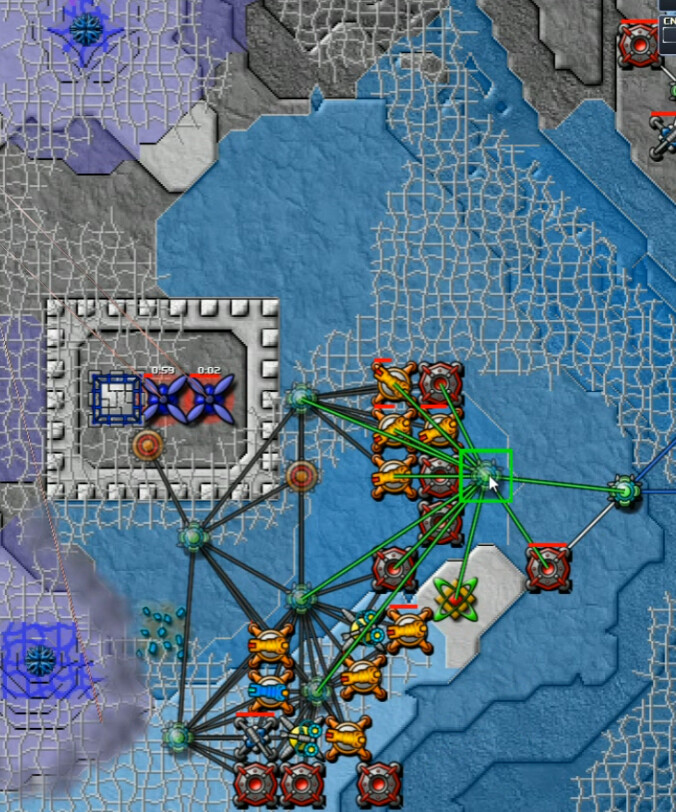
Here I've added a few beams in the north as I'm starting to ramp up for that first wave of incoming in a few minutes time. I've also thrown a Sprayer over here to carpet the area, partly to defend against anything that hits but also because I'm going to want to attack this way. And we've got a connection to a Totem, though we can't do anything with it yet. Naturally the reactors continue to get crammed in wherever there is space.

With the tower two minutes away from its first launch, I've got a Forge up and several Beams as a vanguard in that direction, awaiting impact.

None of them get close, as I continued to build reactors in the leadup to their arrival and also boosted energy storage at the Forge. Those two aspects were crucial, and frankly the previously-devastating attack was swatted aside with a yawn this time. The defensive phase was now over.

I give you the Sniper Porch. I expanded here in the southwest for the purposes of getting a good, elevated kill-zone set up on the Runners so they won't be scampering all over the map in significant numbers. They got off some stun attacks and some spores hit while I was setting this up, but I persisted and with minor difficulties everything was eventually in place. This proved highly effective; I would not see any significant runner issues for the rest of the battle. I had somewhat underestimated the energy requirements, so I spent some time pushing out a bit more and building more reactors.

This emitter on the right-side hill was the next target, and a shield will help us reach it. I do occasionally actually listen
. 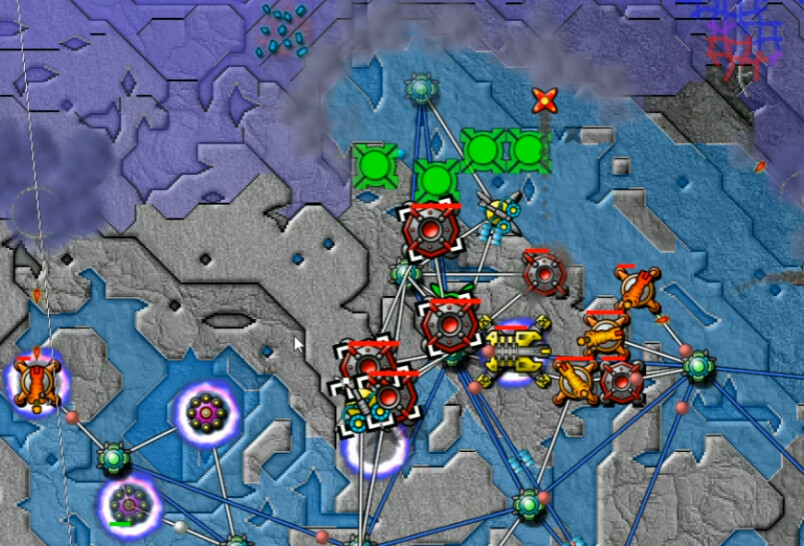
Winning this map after you've reached a good position is grindier than many, and much of that effort is cut out of the footage. Here we've reached and conquered the northwest section where that bastard spore tower held forth. It won't be bothering us any more. I proceeded with this concept of either putting SuperBerthas or SuperReactors up on the Power Zones, until it was relatively pointless at a certain stage.
Due east across a few rivers of digitalis is this cluster of four emitters atop a Digitalis Hill. It proved mildly annoying, but nothing was going to stop me at this point.
Then the 'army' turns south to this hillside, which houses several enemies. By now it was often just a case of getting relays placed fast enough, and moving things rapidly en masse.
And in the southwest was the finish, a little more of everything and most of the runner nests were here. Despite the fact that the cleanup is pretty tedious, there were some clever aspects to Shallow Meat. I must give this map a seal of approval.